
How to Easily Resize Your Photos with Procreate
It doesn't have to be complicated!

Since retiring from my own gallery, I have been showing my work at a local gallery owned by a good friend of mine. I help out by writing the newsletter via Substack and I have designed some flyers and other printed materials for them.
There are 25+ artists in the gallery and doing a call for photos of their work is ALWAYS a nightmare. One recent batch of photos came to me at 1 inch by 1 inch and 72ppi. Not!
“Can’t you just blow them up?” the artist asked when I told her we needed new photos.
We could blow them up, but then we would have something that looked more like a quilt block pattern than a picture of something.
I know that “resolution” of photos is something that mystifies most artists.
Having owned a graphic design firm and print brokerage for a long time in San Francisco - before AND AFTER digital came along - I am not mystified by photo resolution, and maybe I can help you with that too.
Photos, both digital and in real life are made up of dots - so small that you can’t see them with the naked eye. Sharpness in the printed photo depends entirely on the size of those dots.
Georges Seurat, the famous French Post Impressionist who devised the “Pointillism” technique, also shows us the most understandable example of how dots can make a picture. Here is “Sunday Afternoon on The Island of La Grande-Jatte”, arguably his most well known painting. It is made of thousands of unblended, individual paint dabs.
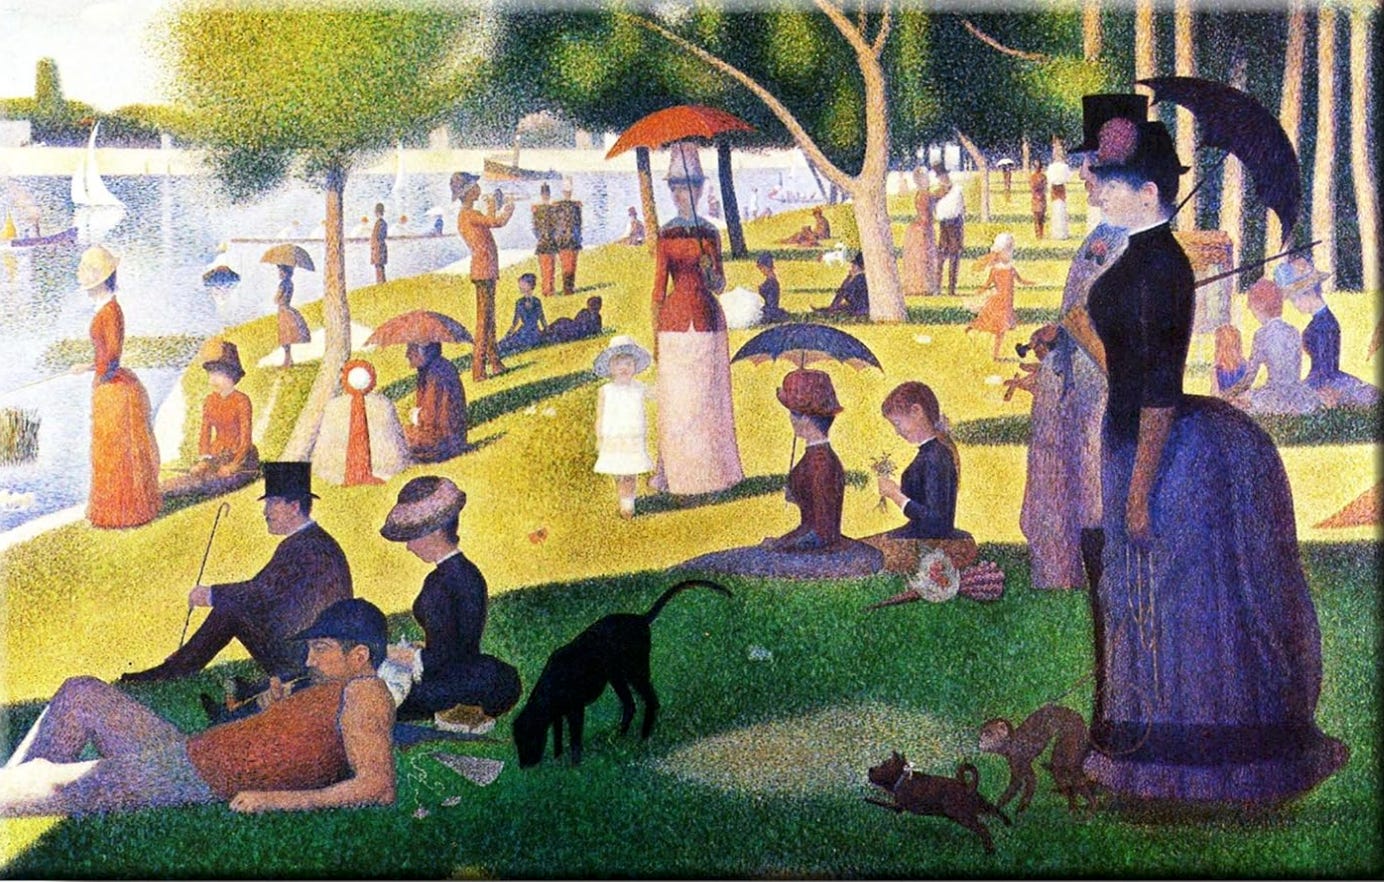
Here is what it looks like if you are very close-up.
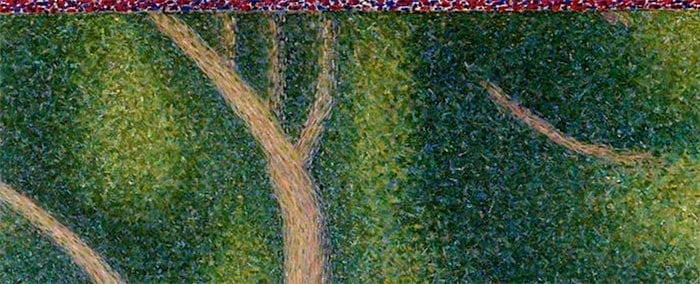
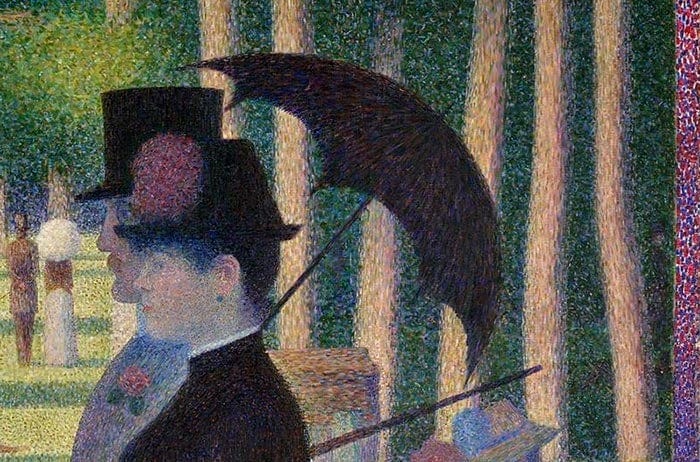
So now, thanks to Georges, we can understand some things . . .
Printers put dots of ink on paper to print pictures. They need 300 dots per inch (DPI) to print a decently sharp picture. That is called the “resolution” of the picture to be printed. This refers to both home printers and print shop printers.
And then, digital media came along. Dots are now pixels (square and not as easily “blurred” by the human eye.). Digital screens (all of them at any size) can best display a picture at 72 pixels per inch (PPI). That is a “dot” that is 4+ times bigger than the printing dot! And it is square! Try to print that and you have a guaranteed mess.
So all your phone photos are shot at that screen “resolution”of 72 PPI. And their physical dimension is huge - like 3 feet by 5 feet (because the pixels are so big and your phone wants lots of them to make a good picture - should you want to print them in the real world). That is why phones and cameras are always advertising thousands of pixels as their “resolution”. You can forget all about that - because it means nothing to you. They surpassed the maximum quality for print a long time ago, and are now just trying to sell new products.
OK - stop right here and take three relaxing breaths before we continue. You’ve got it so far, right?
Luckily, for all of us non-robots, most social media platforms (like Facebook etc.) automatically resize the photos you upload from your phone - to whatever size they want. All remaining at 72 PPI.
But what can you do when you want to print your pretty pictures on greeting cards, or when a publication or a gallery wants a picture to put in their printed catalog? That means your photo has to be 300 DPI.
So . . . you need to know how to change your photos to that much smaller dot/pixel size).
There are websites that can do that, and software that can do that like Photoshop, Affinity, etc. They open a window in which you choose PPI and/or dimensions. But, they seem to have a baffling effect on most people.
However, if you have Procreate on the iPad, there is a much more intuitive way to resize your photos to exactly the size and dimension you need. And you don’t have to know anything about how to use Procreate! Just follow the steps below.
This photo, shot with my iPhone and cropped on my iPhone, has a resolution of 72PPI and dimensions of 24 x 18 inches (like a big poster). It is great for on screen viewing, and Substack automatically made it smaller to fit this newsletter format. It is now about 10 x 8 inches if we printed it. The print would be very blurry and substandard quality because of the BIG pixels.
If a gallery wanted to put this in their catalog, they would ask me for a 300PPI version at whatever dimensions they needed for their layout. Let’s just say that is 4 x 4 inches. Here is what I would do.
From the Procreate Gallery, tap the Plus sign in the upper right corner for a new canvas, and then tap the Custom icon (black rectangle) in the New Canvas menu.
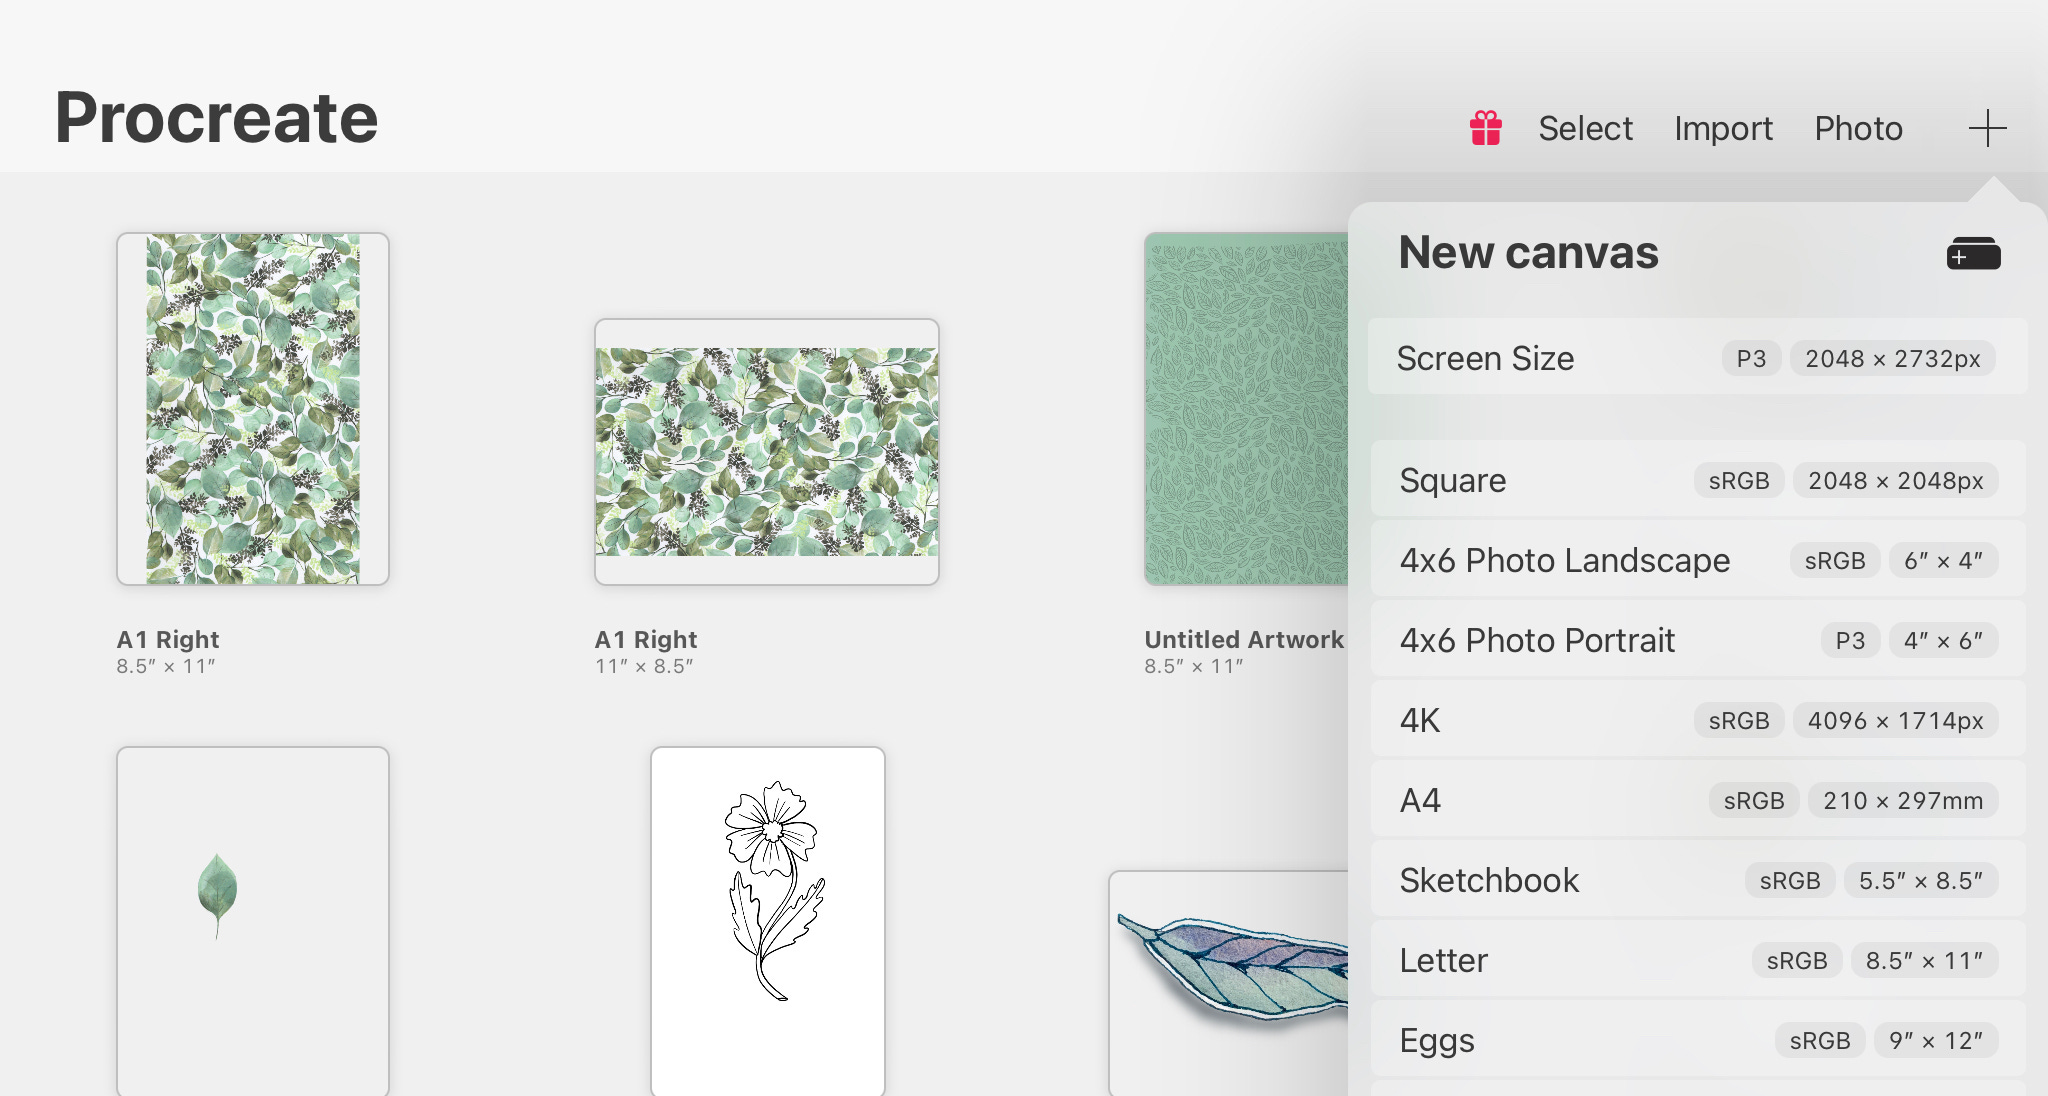
You will get this window in which you can set both the Resolution and the Dimensions for this new canvas. First choose Inches as your measurement, then use the keyboard and Next button to make the Width and Height 4” and the DPI 300. I know it’s weird that a digital program uses DPI instead of PPI, but the terms mean the same thing.
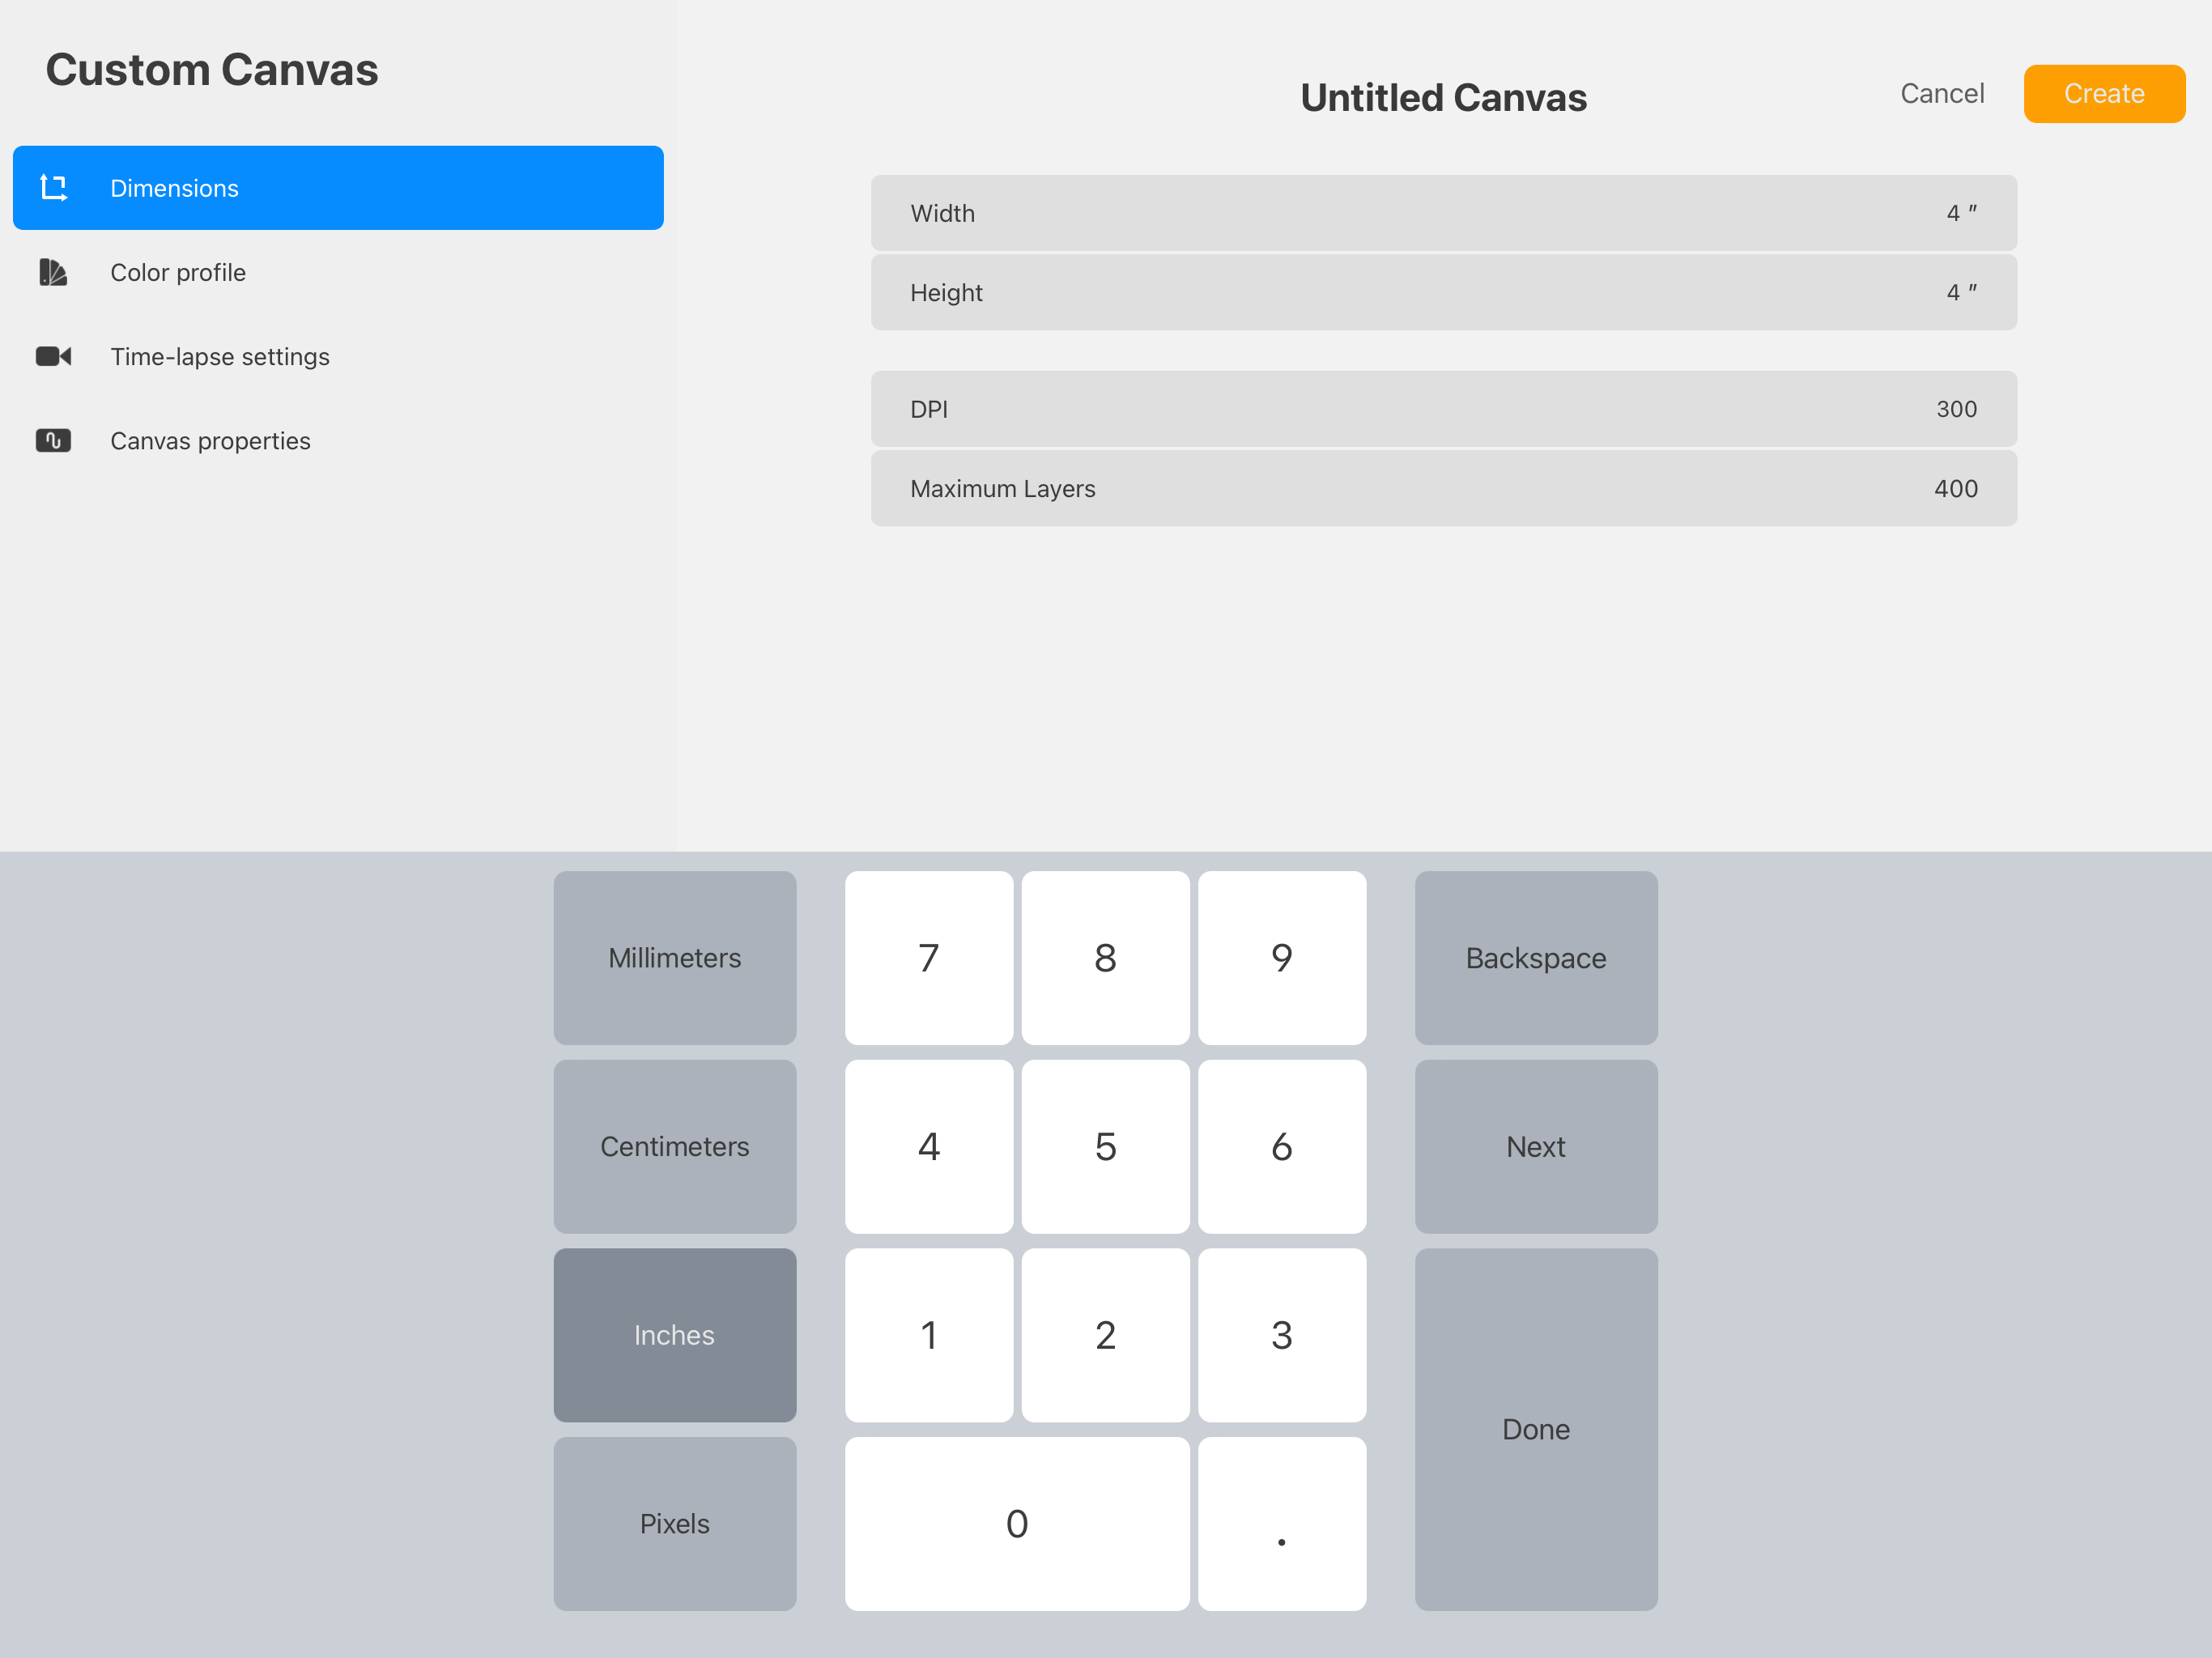
When you are done, tap Create (orange button), and here is your new canvas.
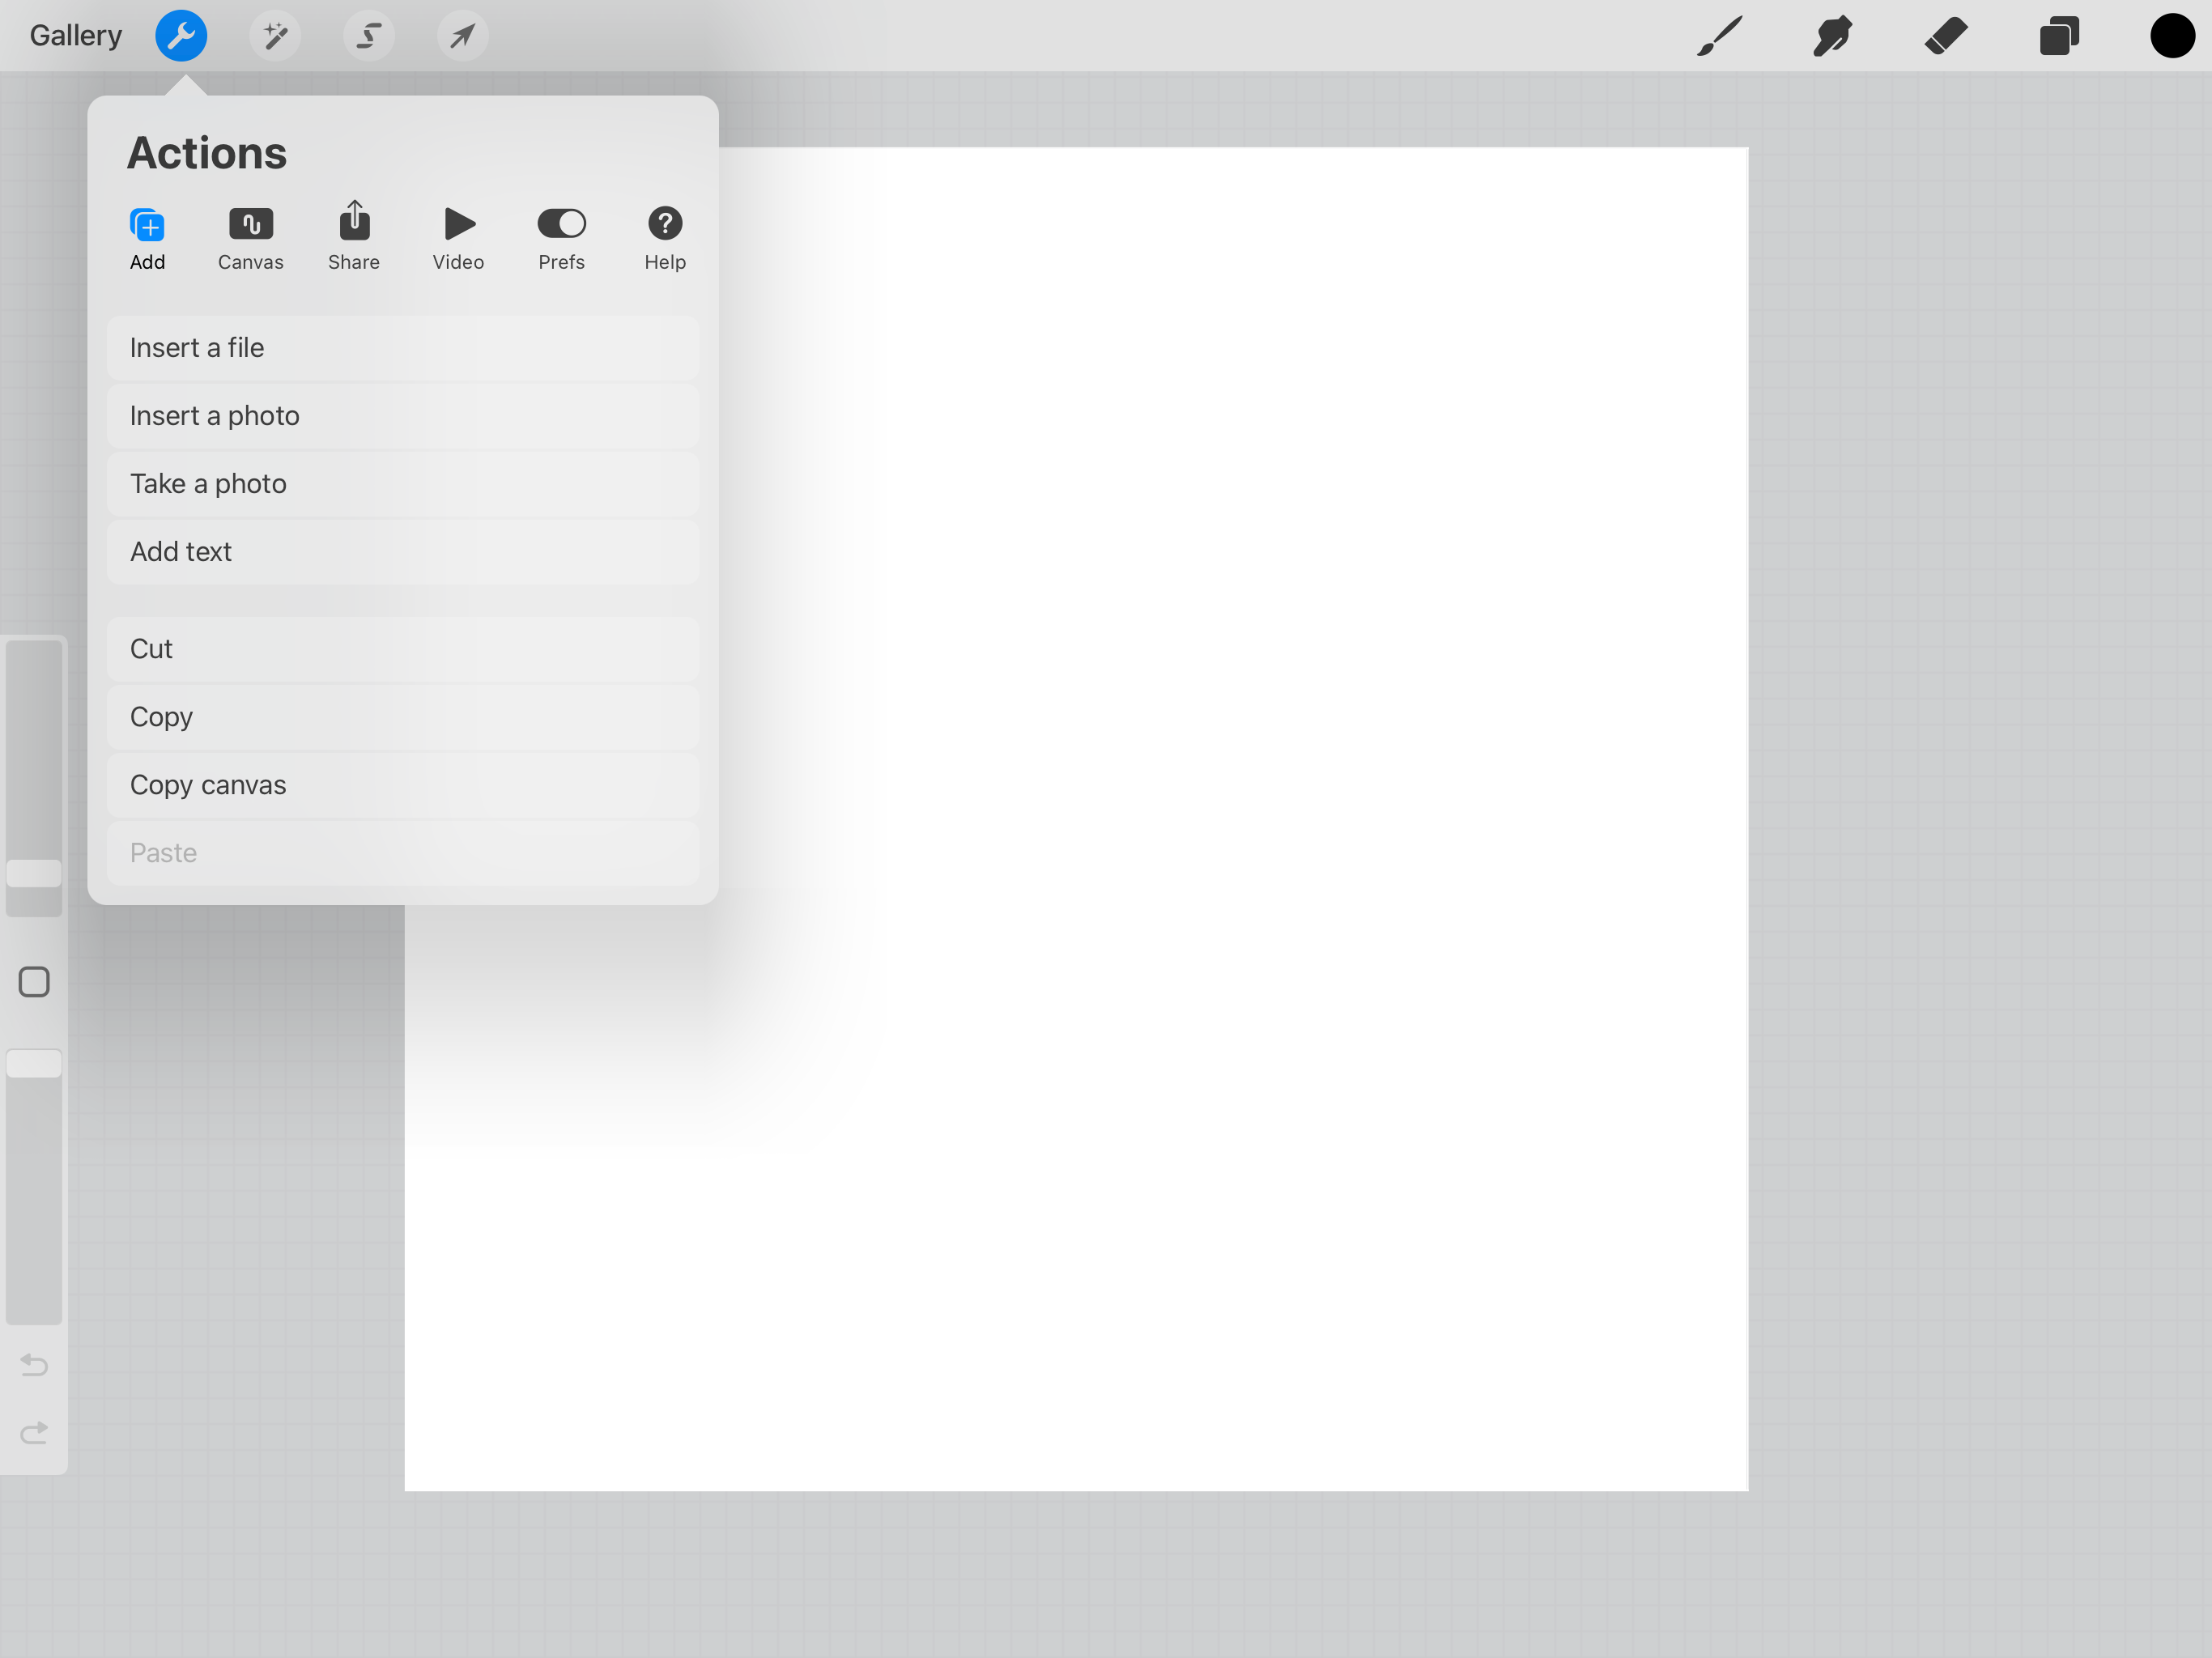
Under the Actions menu, choose Add and then “Insert a Photo” and choose your photo to be resized.
Your photo will likely not fit the canvas - in this case my photo was not a square. While the photo is selected, use the the corner blue dots to make the photo fit the canvas.
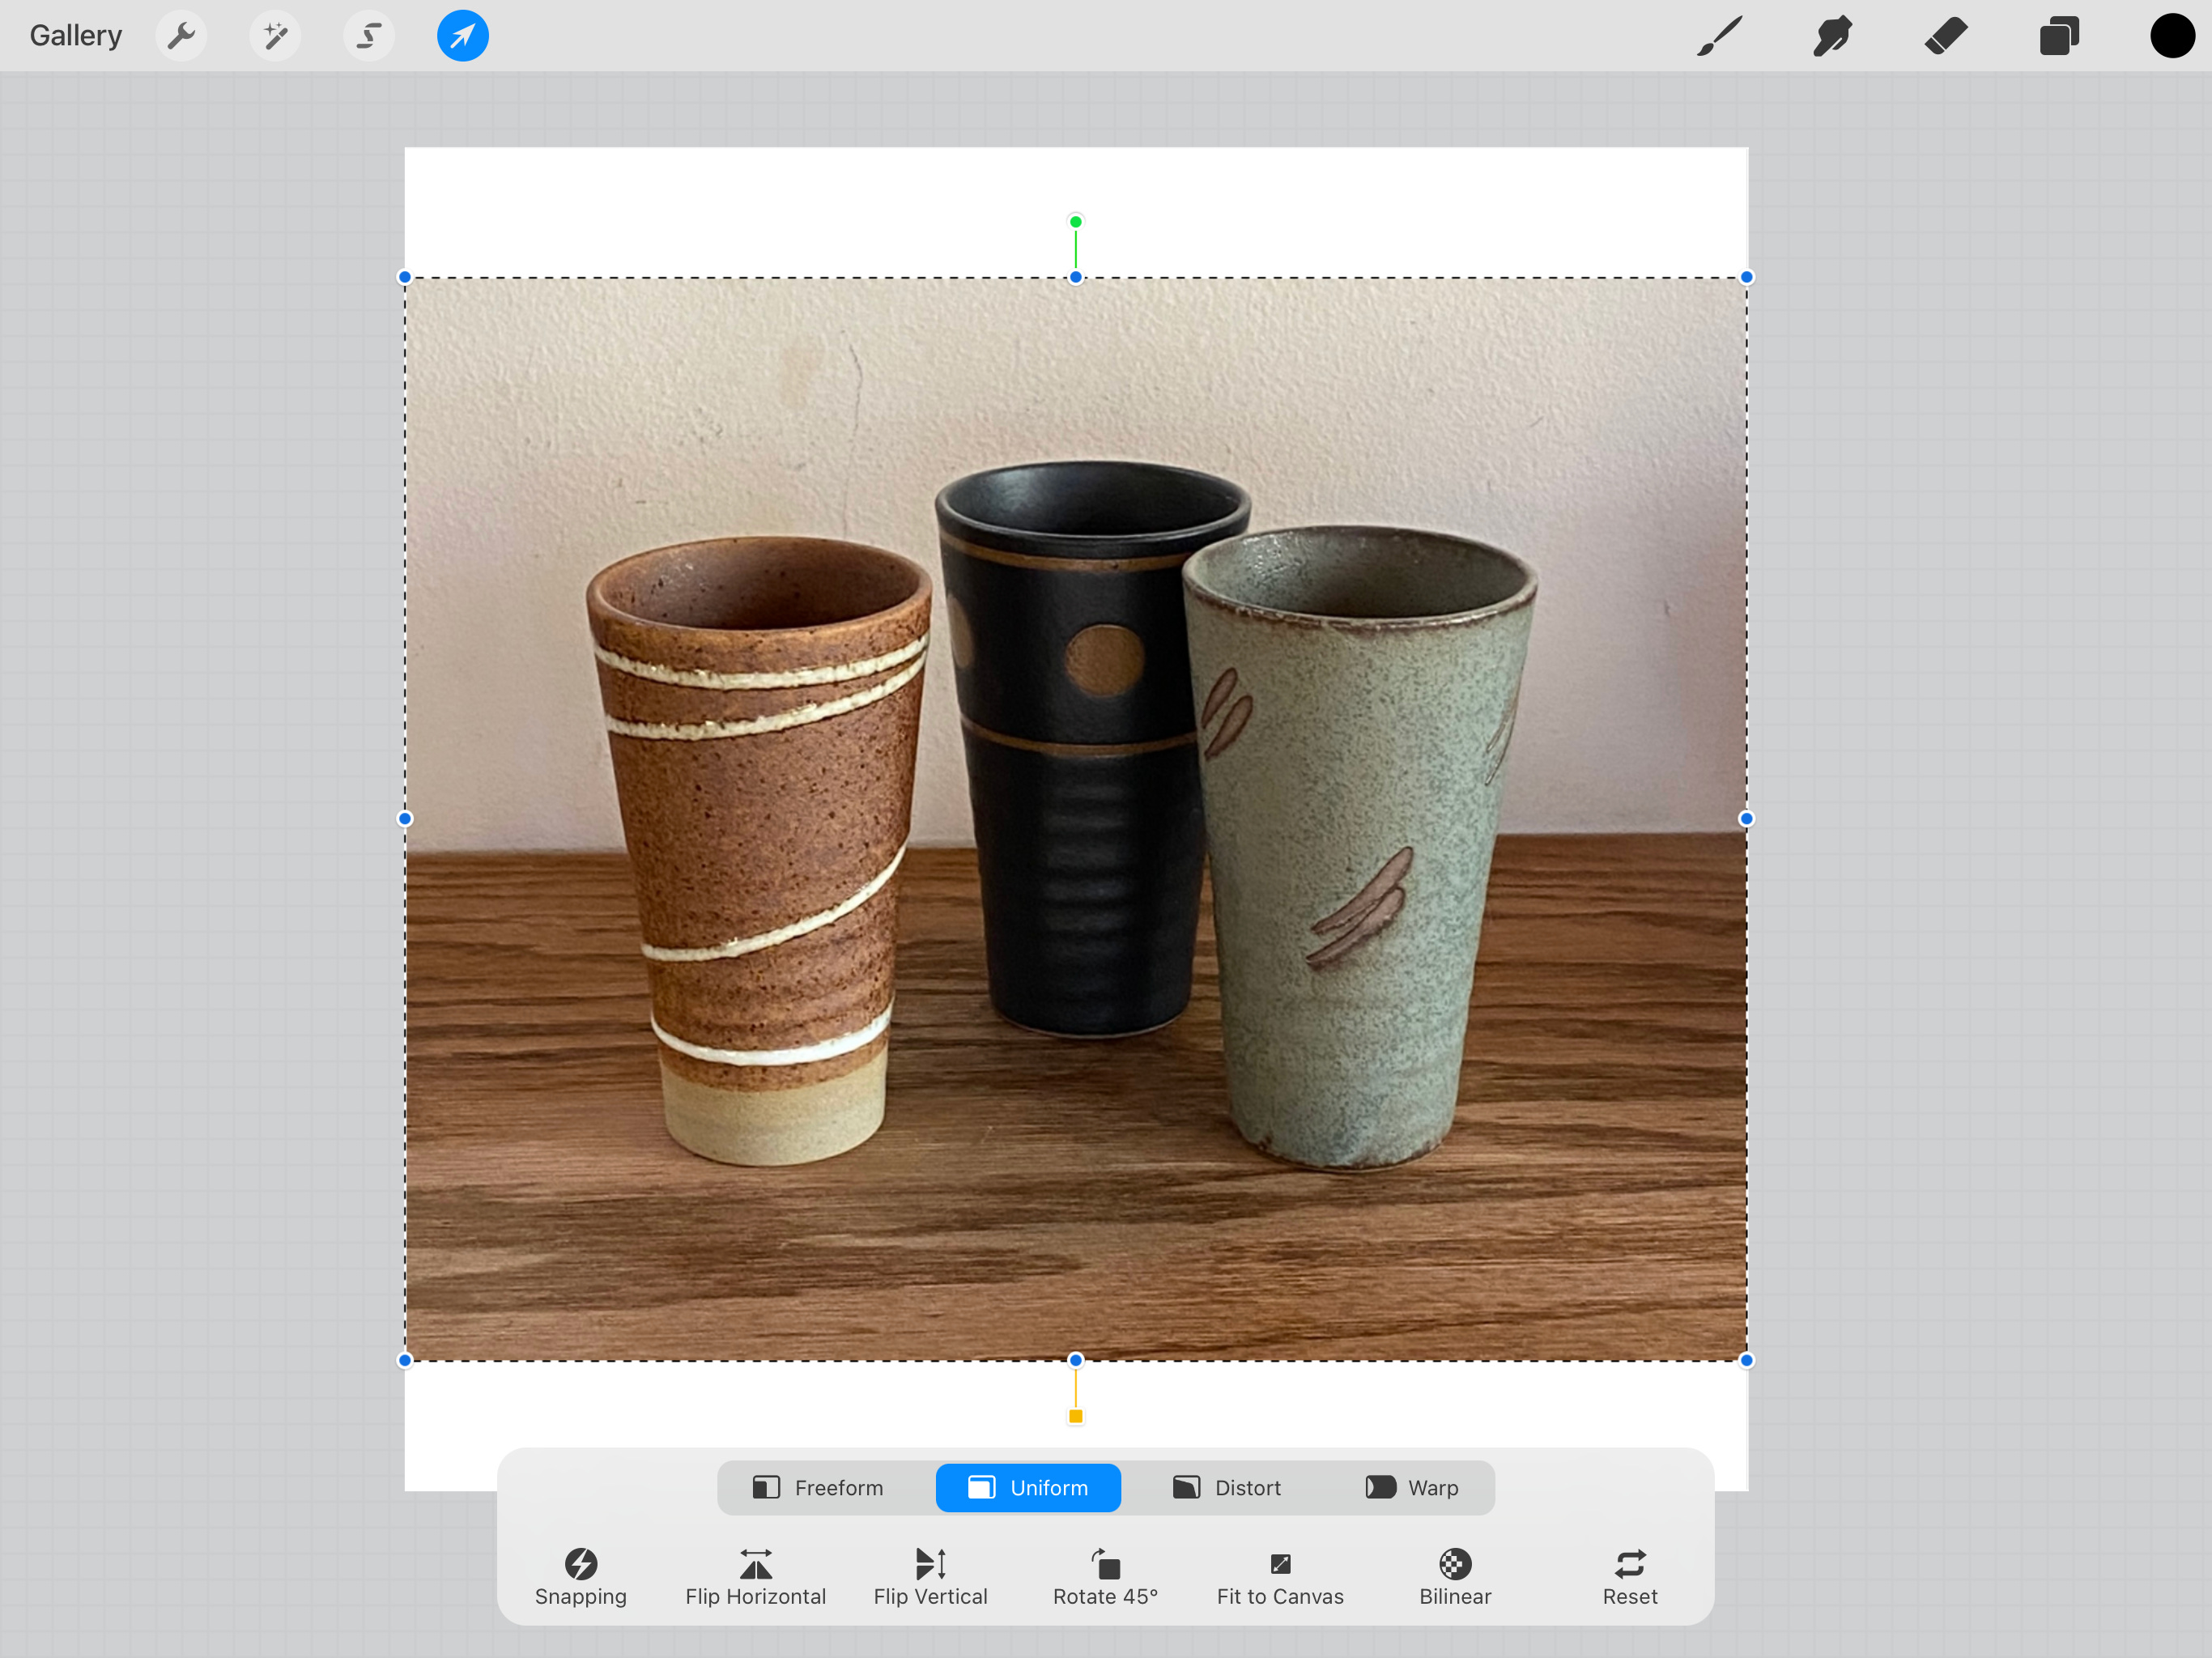
Cropping will occur, so make your best choices about what shows and what doesn’t, and center your image, but the photo MUST completely fill the canvas. What’s left over the edges will just be cropped away. You can also use reverse pinching to expand the image and move it around, if that is more intuitive.
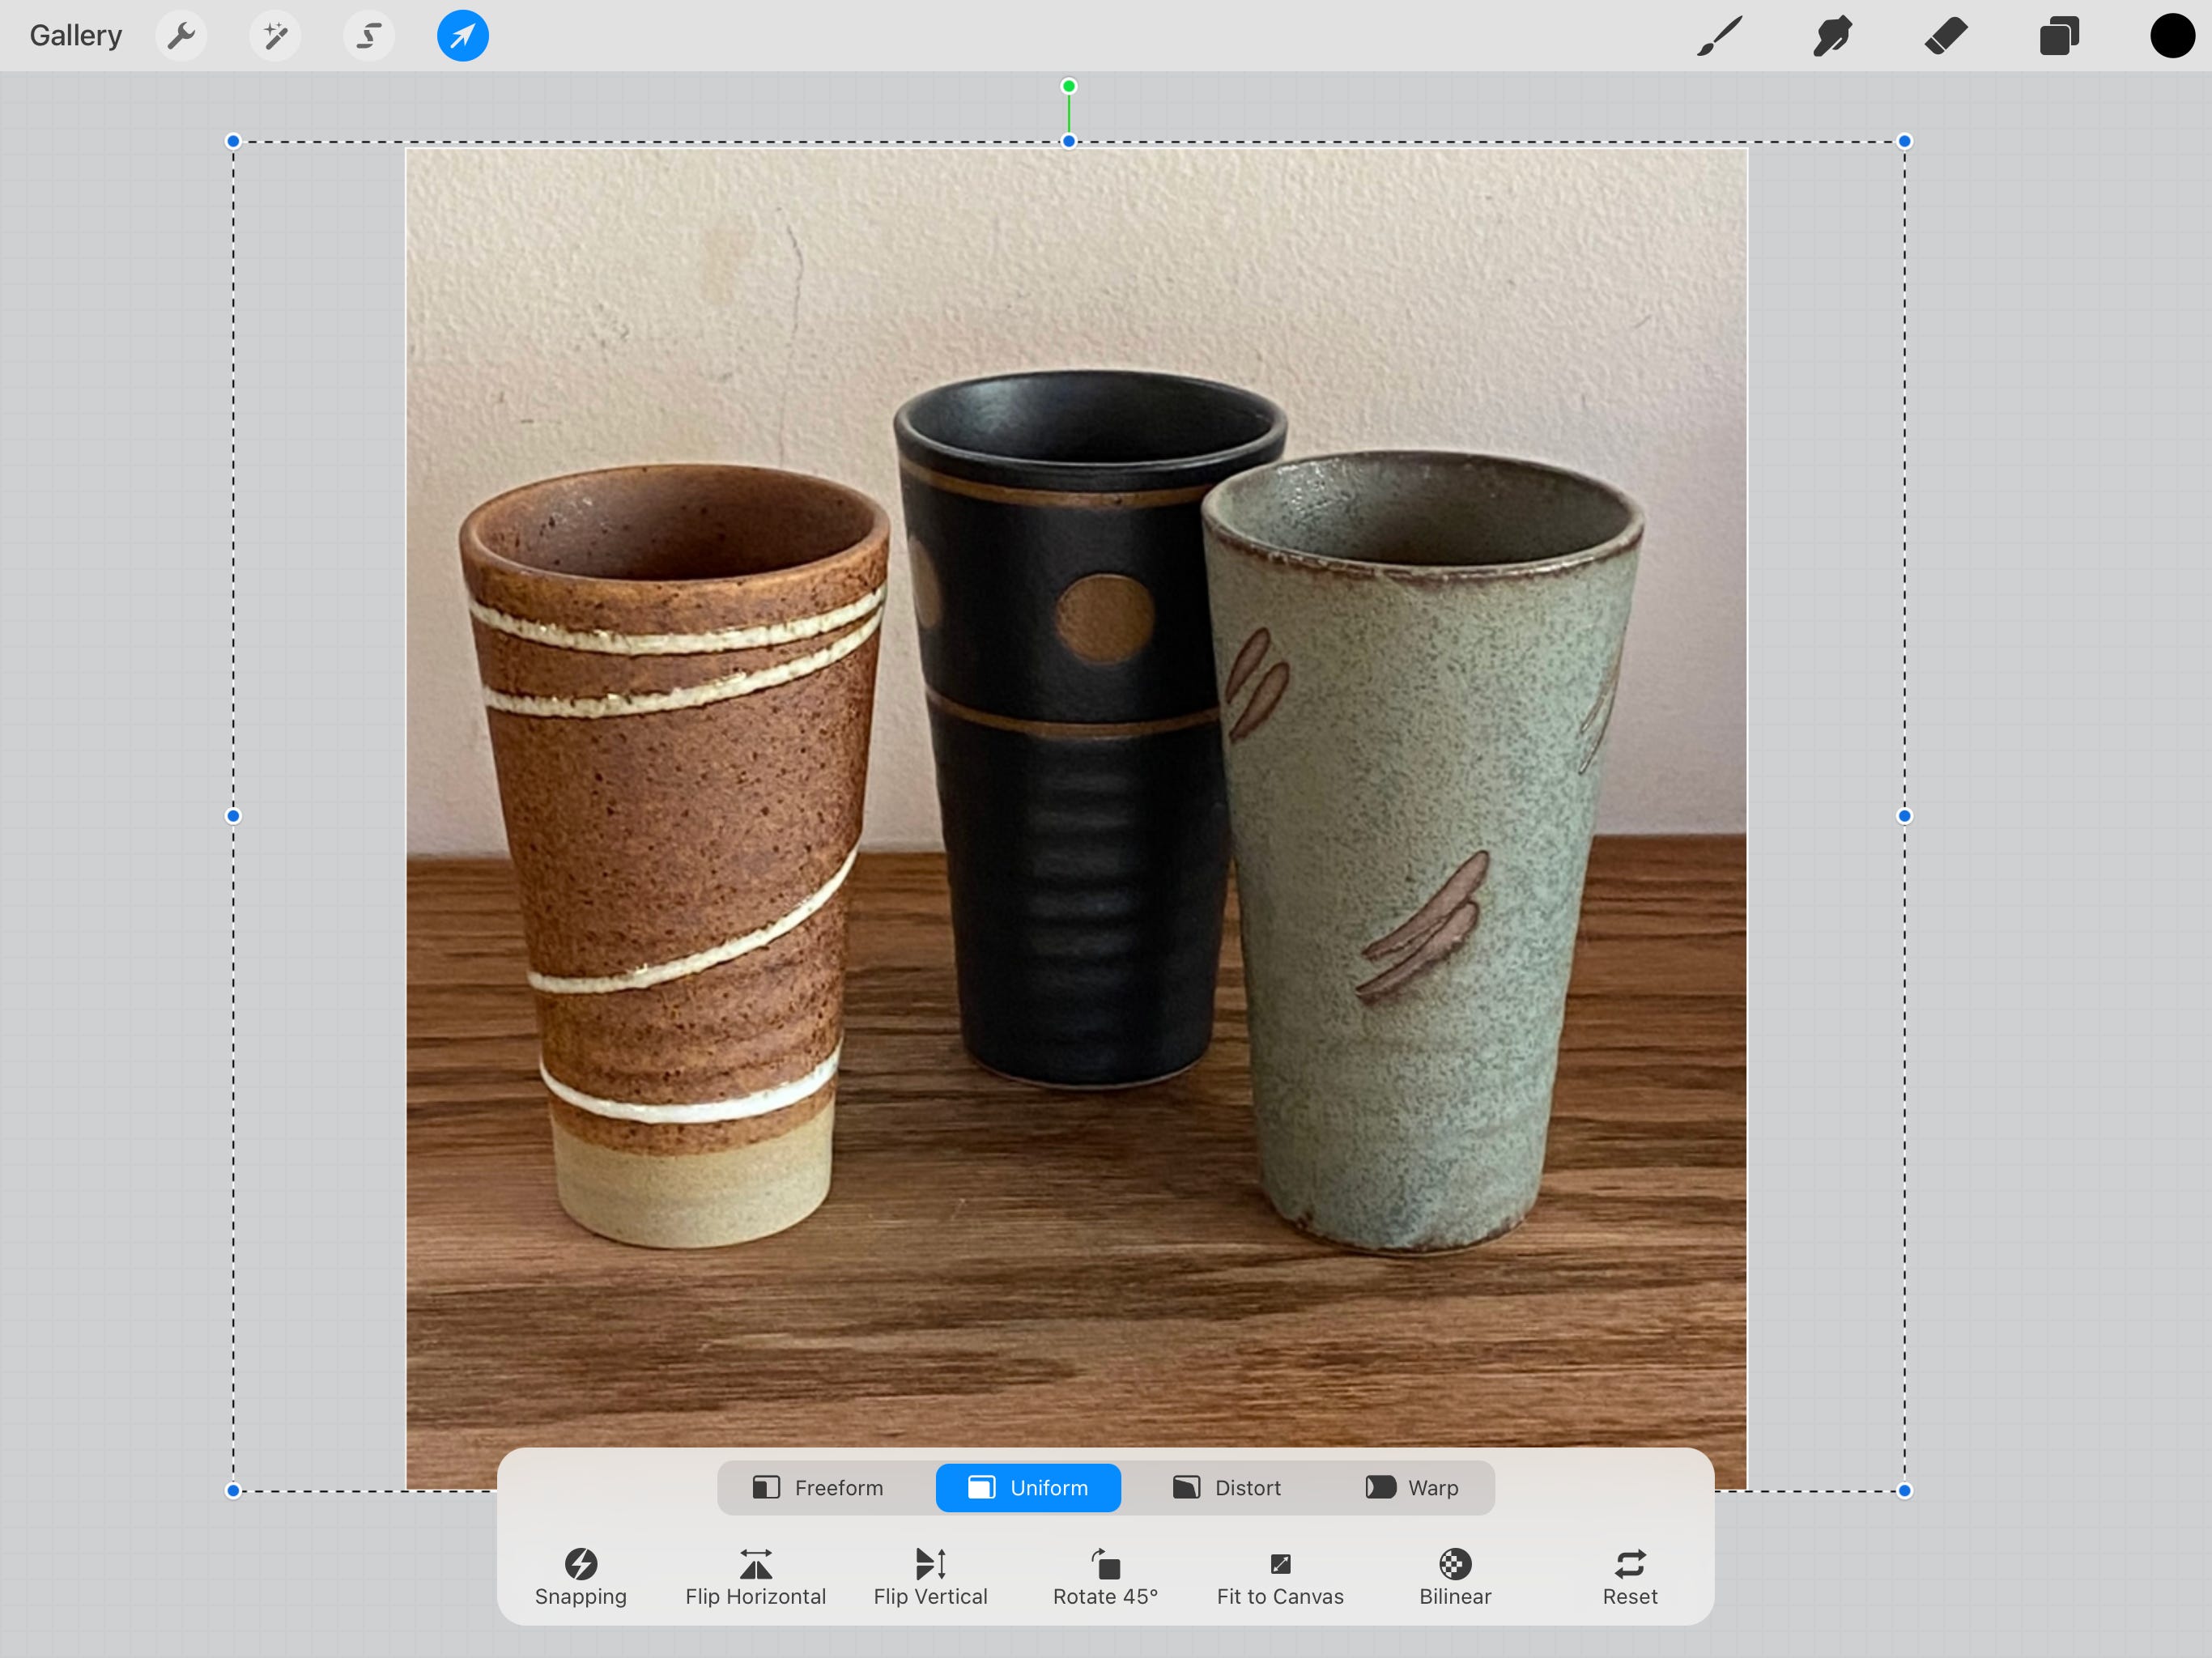
When you have what you want, tap the Arrow in the menu.
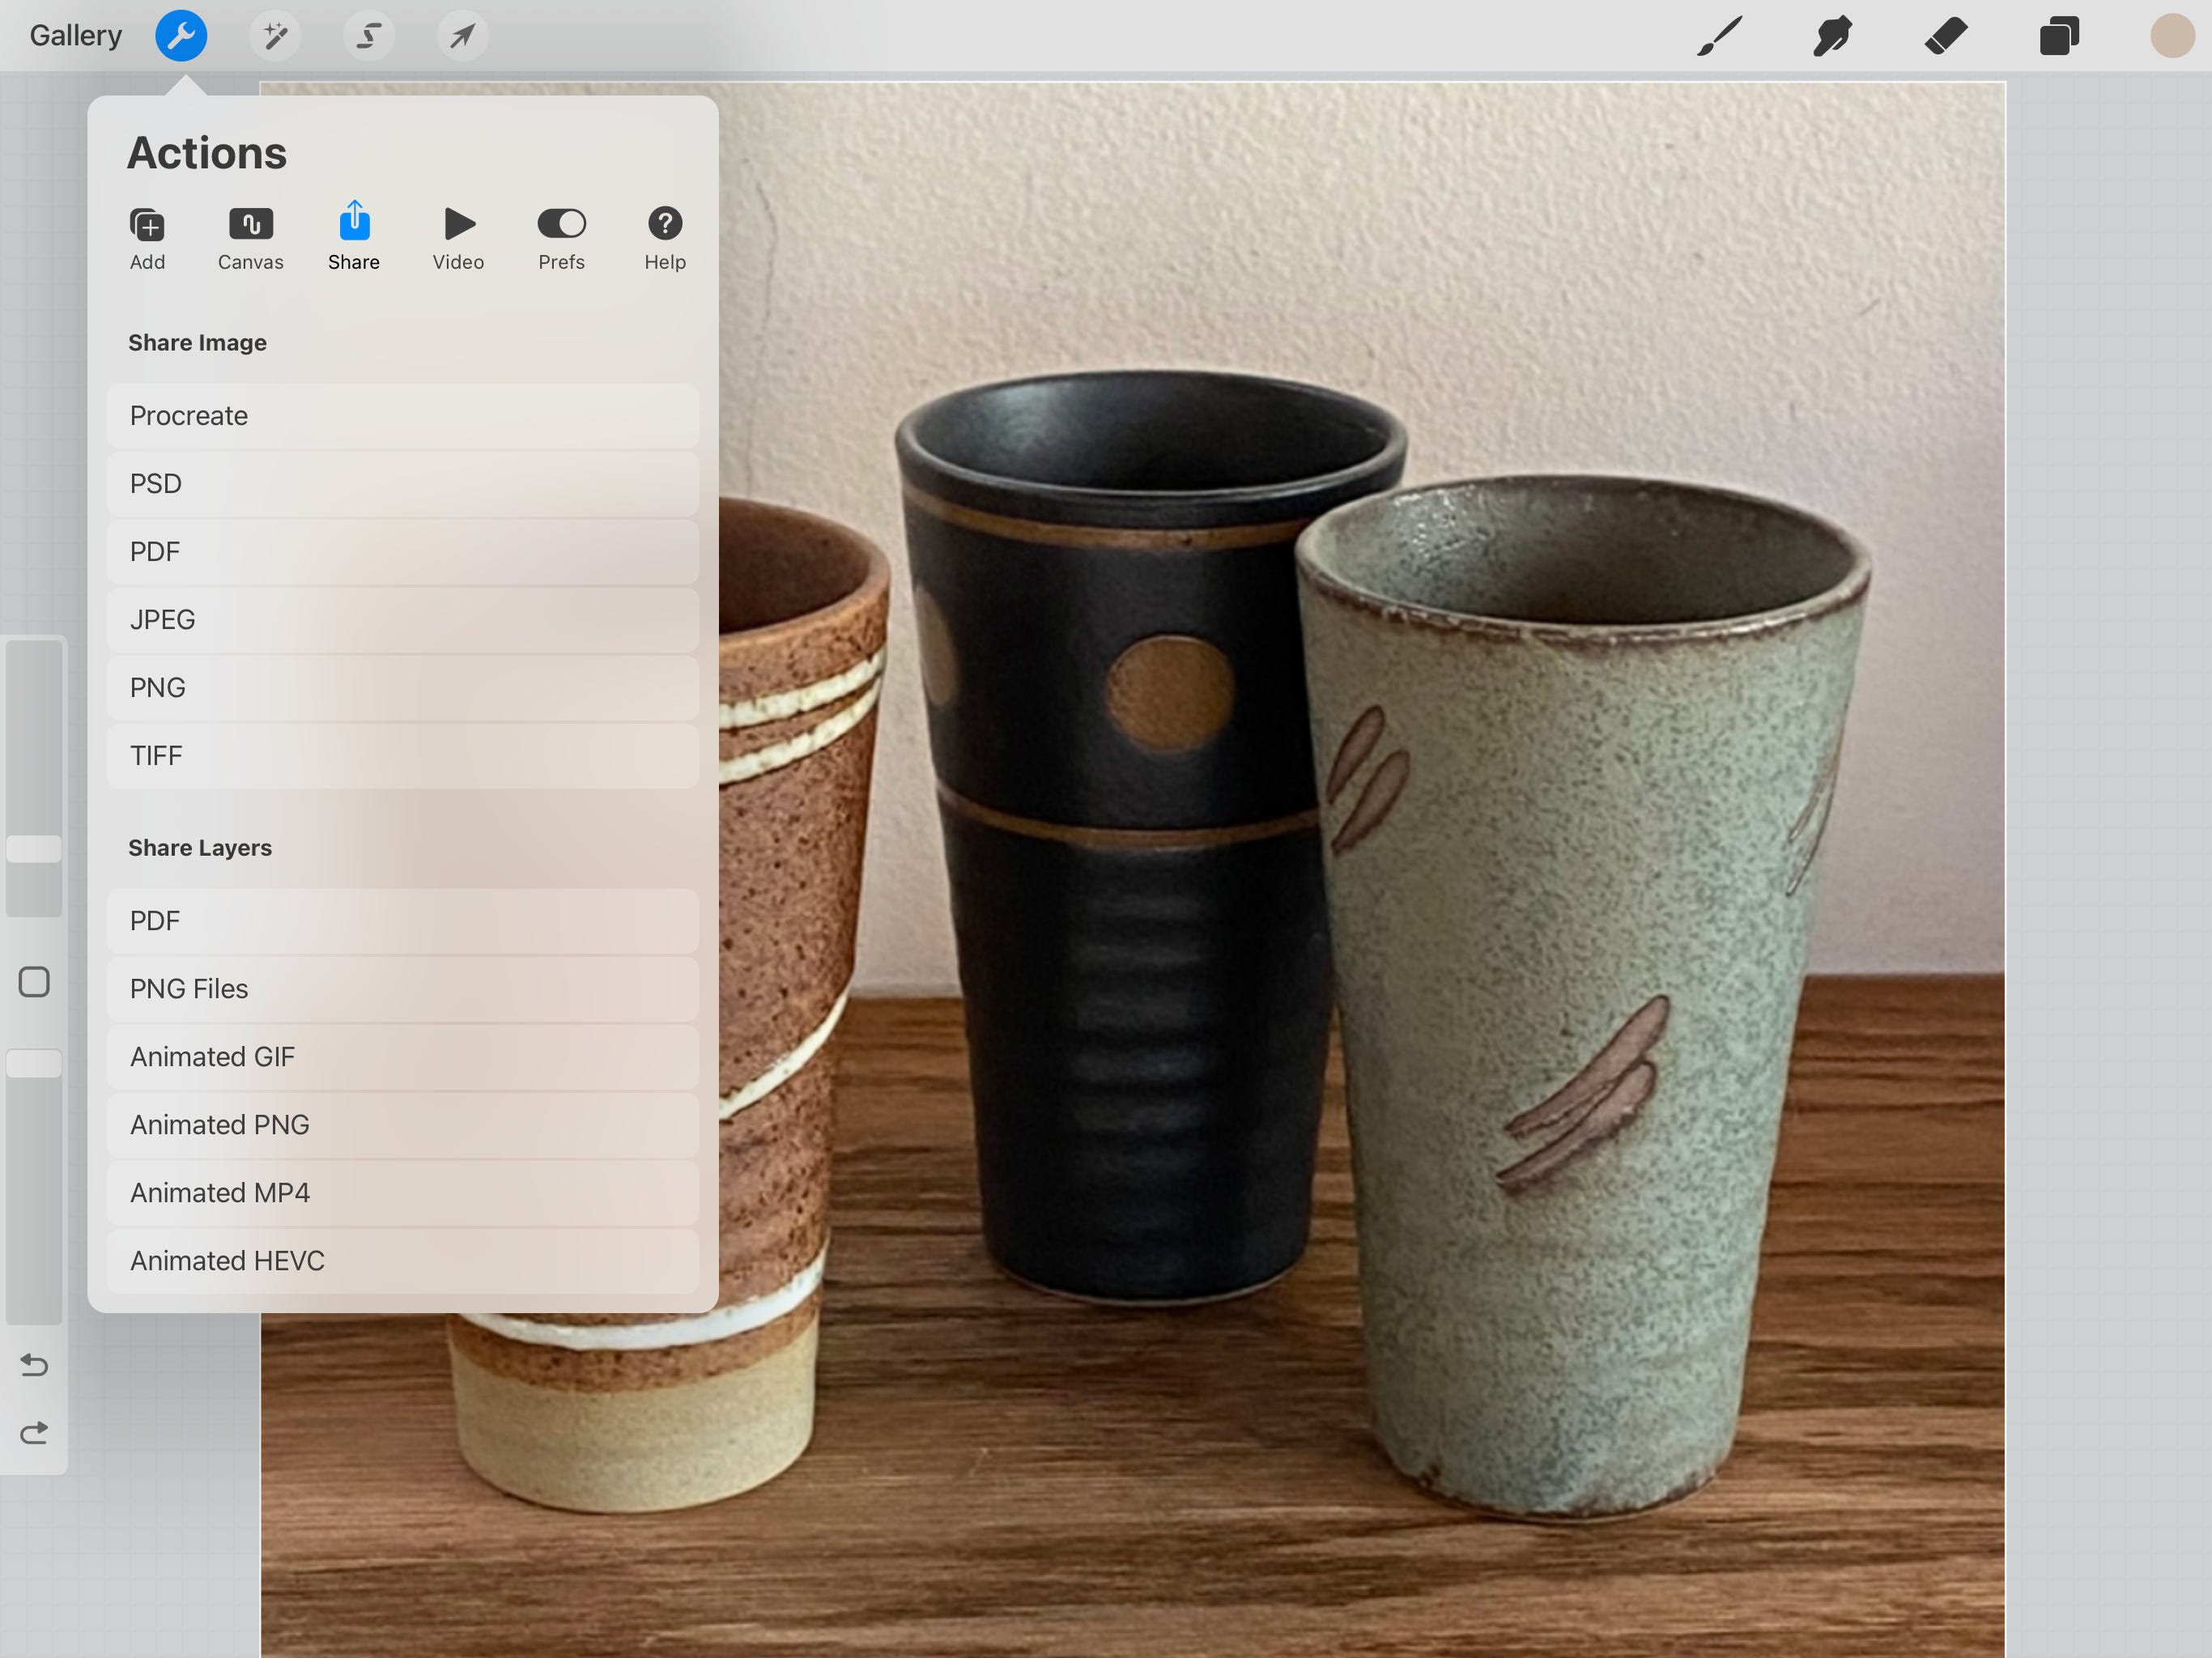
You now have a version of your photo that is 4”x4” and 300 PPI. Use the Share option in the Actions menu to export the photo for use. Most common is the JPG format. Give the file a different name so you don’t confuse it with the original.
That’s it - and it wasn’t one bit confusing.
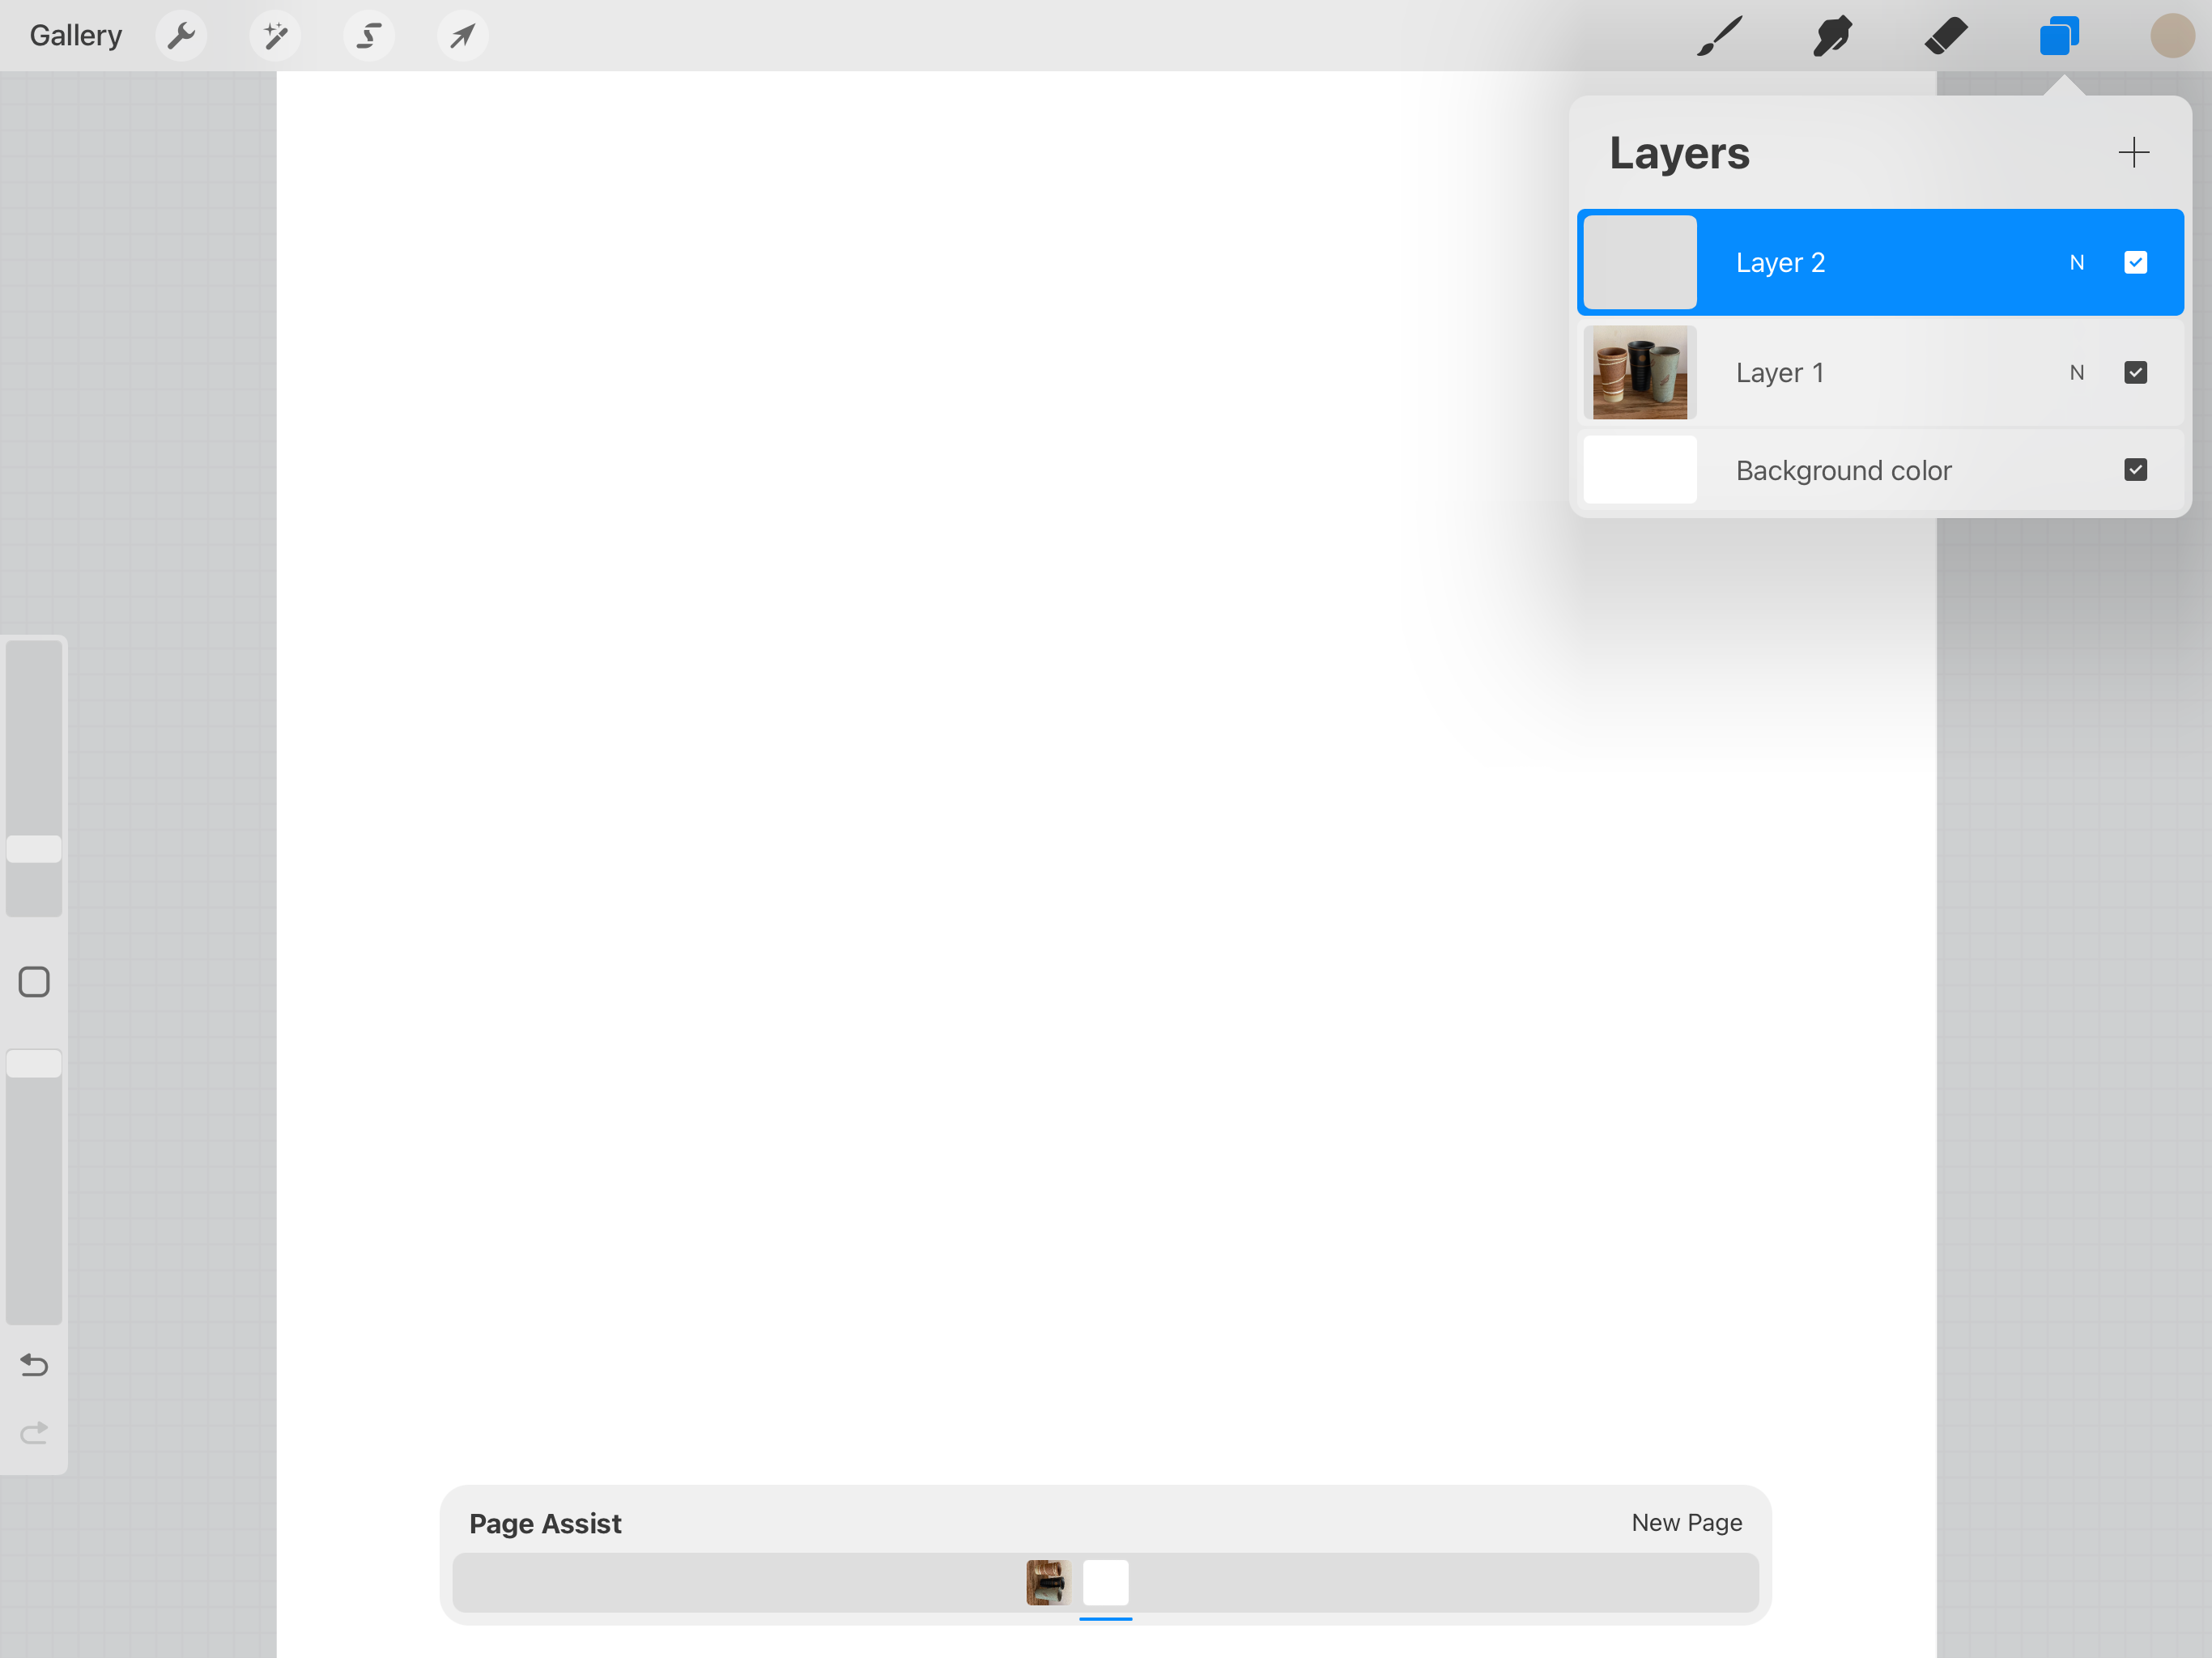
If you have more than one photo to resize, you can make a new canvas for each, or you can use the one file for all of them - each on their own Layer.
Here is a trick to avoid having to turn Layers on and off to export different photos.
Under the Actions menu, choose Canvas and turn on the Page Assist button. Notice the new Page Assist menu at the bottom of the screen.
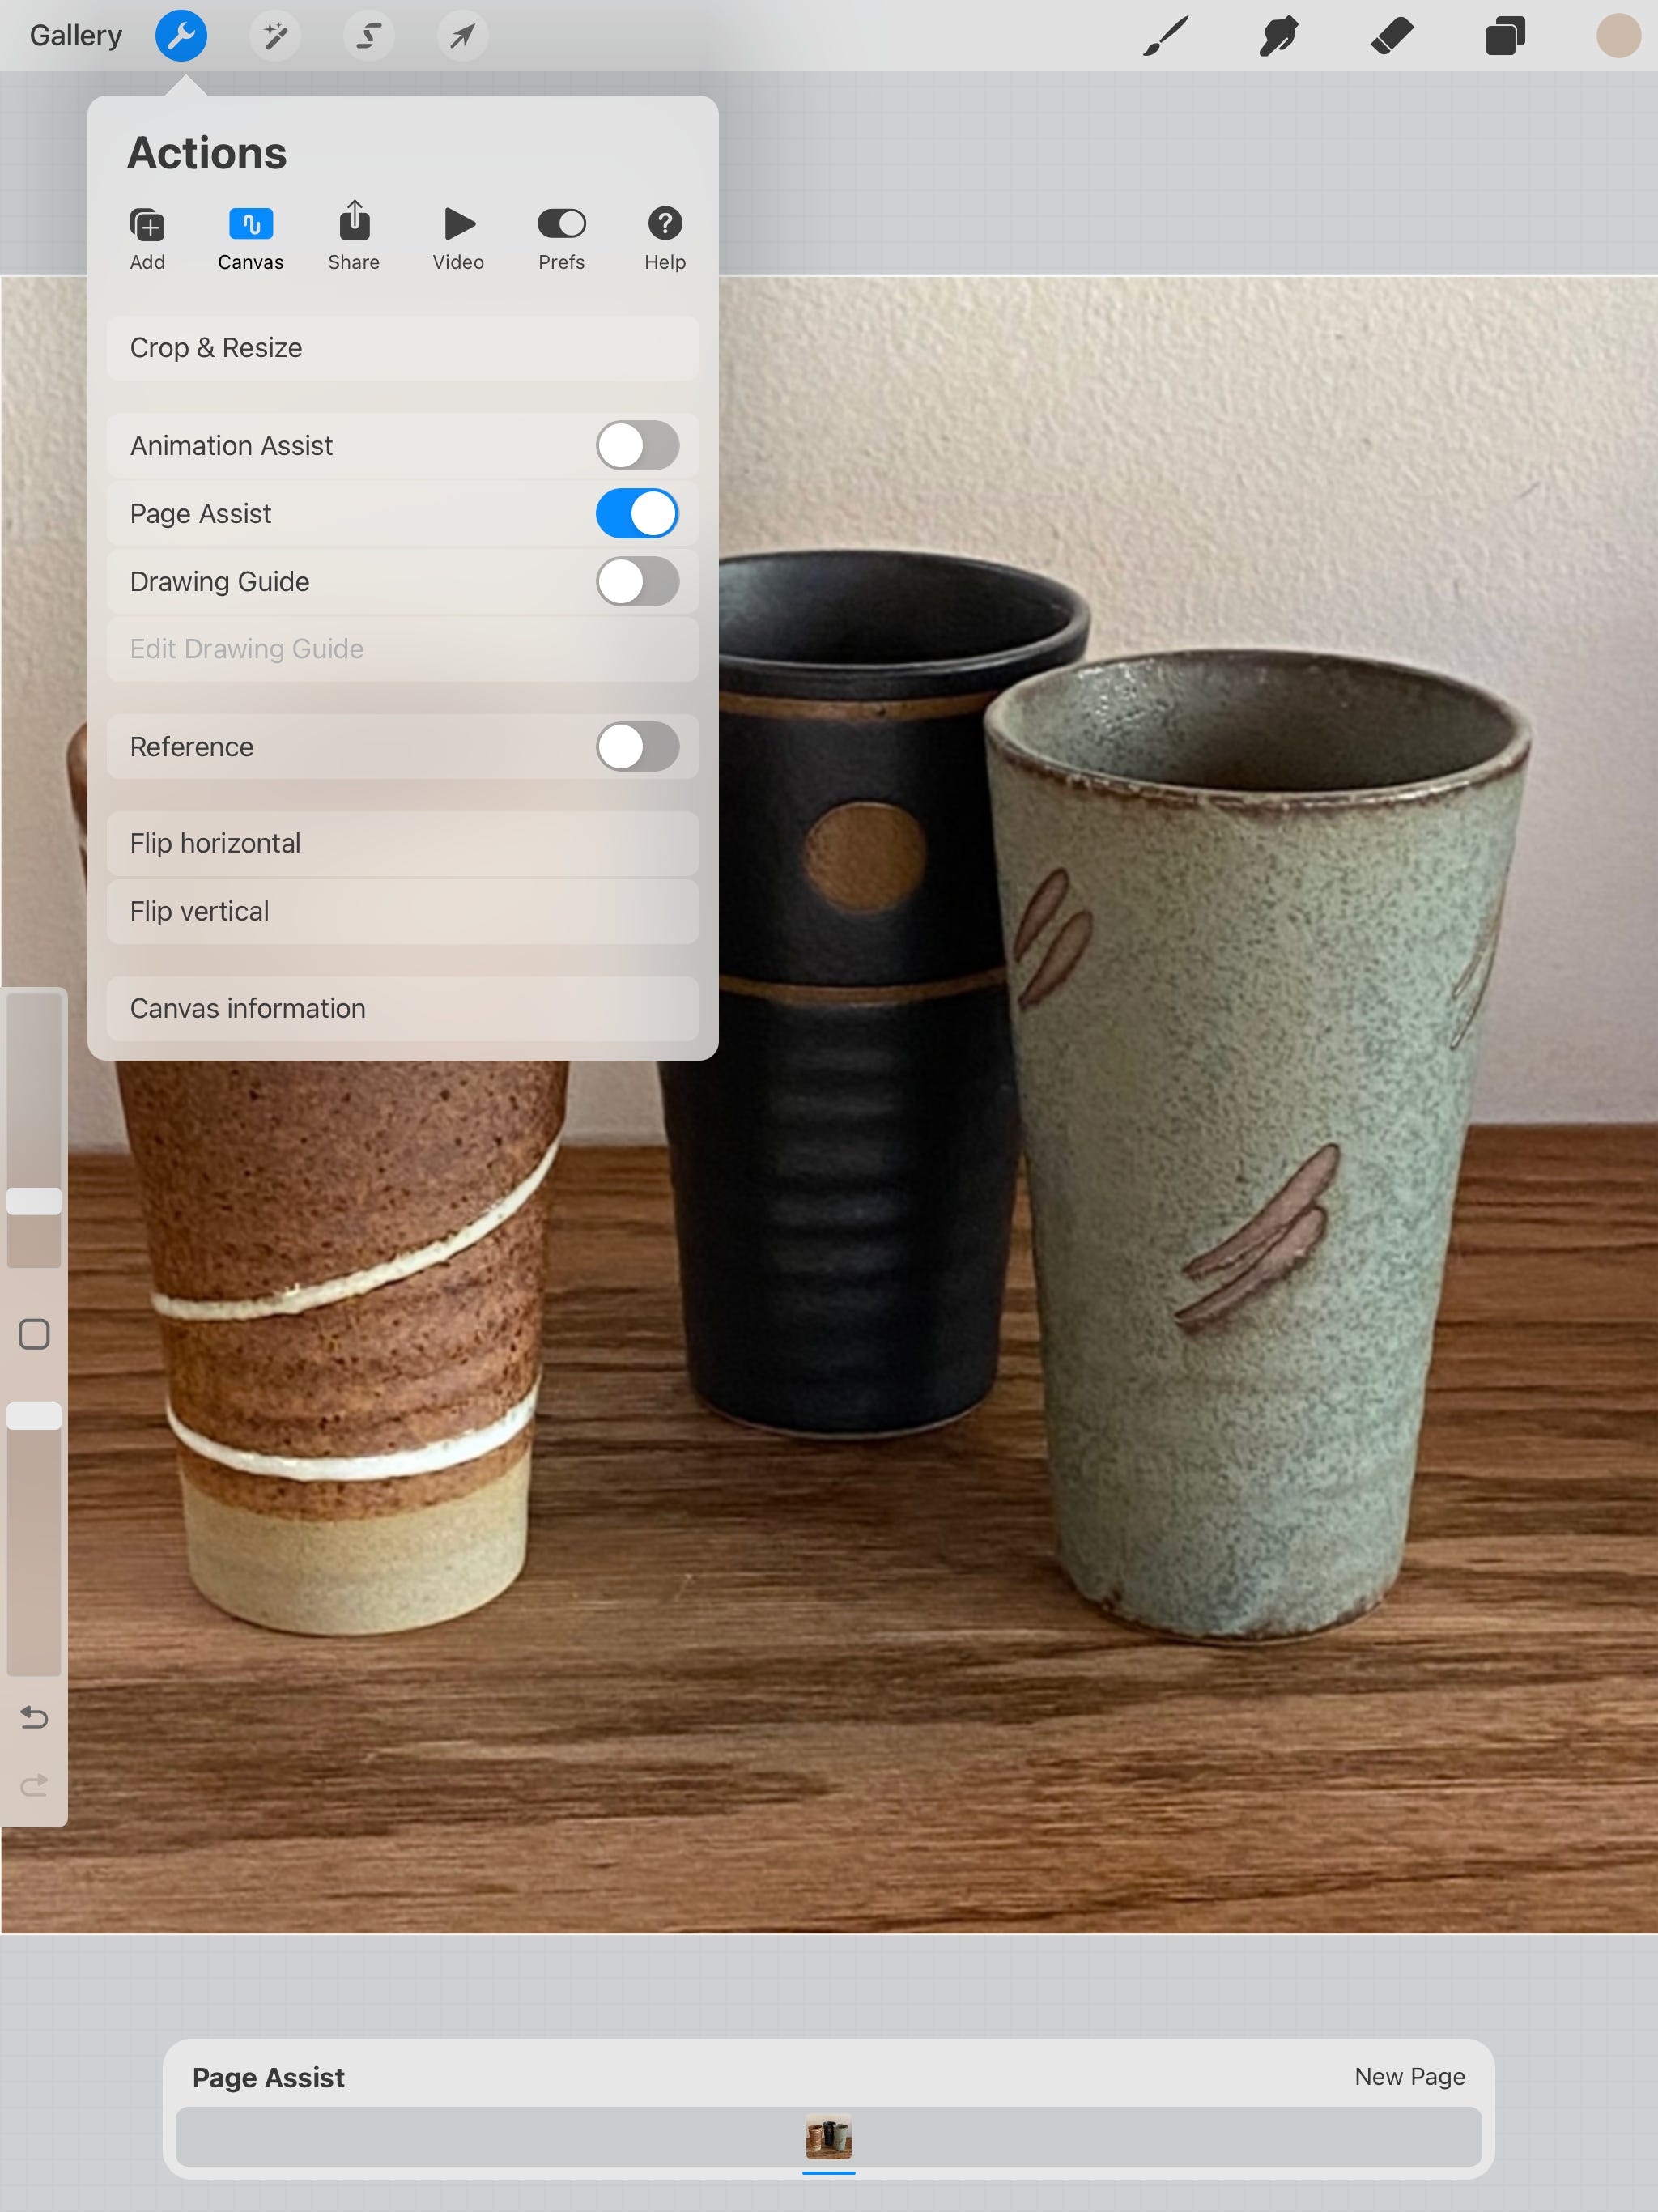
What this does is make each new Layer you create a separate Page so no other Layer is visible except the one you have chosen.
So, all photos that need to be 4”x4” and 300 PPI can reside in this same file for easy access if you should need them again.
I really hope this helps many of my readers and friends who find resizing photos to be a mind boggling hurdle. If you don’t have Procreate, the amazingly low price of the app is worth it just for this function! And you just might fall in love with all the other magic of the app while you’re at it.
Until next time . . .
This is a public post. Please share it with anyone you think it might help!
Thank you - Hope it comes in handy - and you can always find it on my Substack site as well.
Thank you. I do try to simplify, but I have also failed at explaining resizing to bunches of people too. I think this Procreate hack might do the trick.